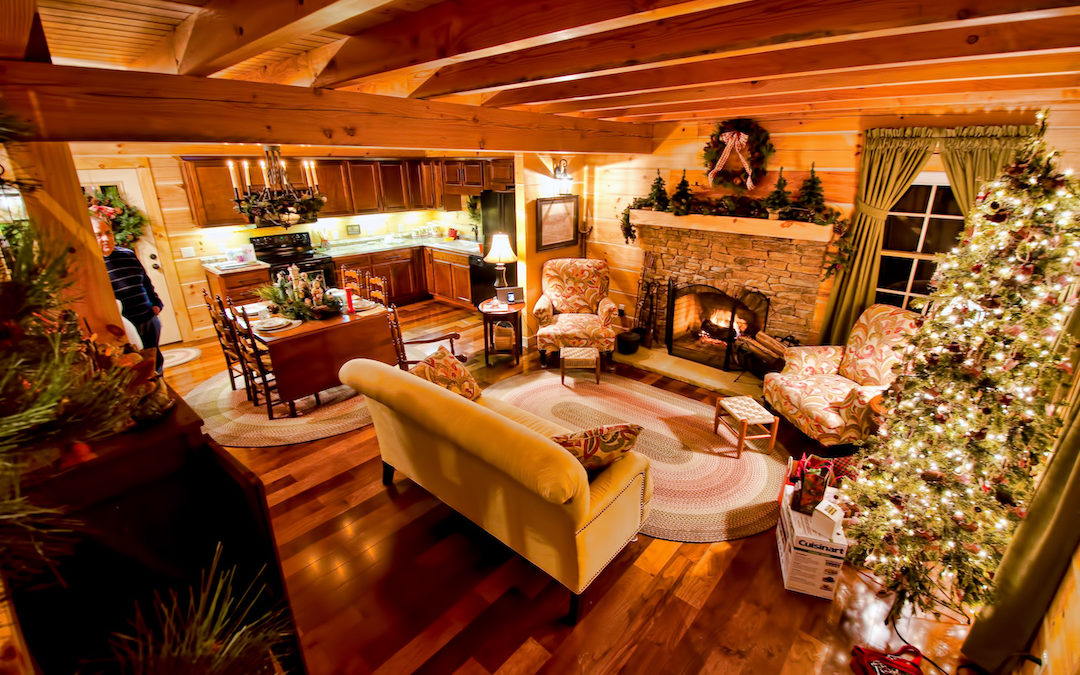
Moving from a traditional stick-framed home to a log cabin can feel like embarking on a forever vacation adventure….or it can be an utterly disappointing disaster. Often the difference maker in which direction you land comes down to planning backwards, a twist on the usual method that 100% guarantees avoiding the disaster scenario.
Whether approached as a consultant, log/timber home designer, or interior designer (because our firm specializes in all 3 for log & timber homes), I tell every new client that the secret to achieving the home of their dreams we have to begin with the end.
I ask them to imagine themselves in the completed home/cabin – their perfect dream home. I then ask them to describe all the feelings they get as they go through daily activities like waking, having a morning coffee, listening to music, watching the game on tv, preparing dinner for 2 (or 20!), and even watching the sun set while relaxing in front of a cozy fire. Then we talk about how the shape and fitting of each space they move through will support the activities or functions that fit their lifestyle.
The entire structure, from rooms, cabinets, windows, even decks and ceilings starts to take shape around their perfect vision. Things as simple as how far the coffee machine is from the bedroom might make the biggest difference in how “fun” it will be living in their dream home.
Now, when it comes to log cabins, this method of planning becomes acutely important. Log walls, unlike traditional framed walls, have one chance only to locate elements that are key to hitting near perfection in the final product. Electrical outlets, wiring for light switches for example are next to immovable once the logs have been erected on site. If you don’t have a solid plan for exactly where your furniture is going to be placed, you may end up with extension cords running all over the place.
With log, changes to the design once construction has begun are harder, or at times impossible without adding significant time and money to the project. Moving a window to reveal the magnificent mountain view from the dining table is a tough challenge we had to work around with one client. The logs were in place, holes cut already, and we needed to move that window 3 feet to the left to capture those views. The challenge: to do with the abandoned hole? It couldn’t be filled with drywall, that’s for sure! It was a big dilemma. Eventually, we settled on ordering a larger window, which took another 3 months to arrive and added unnecessary cost to the project.
Other details that require greater attention when planning for a dreamy lifetime in your log cabin:
- Organized storage – too often storage is overlooked in log cabins. I can’t explain why, but it does happen often! Take the time to consider all the things than need to have a specific location (broom, ironing board, toaster, winter blankets, snow shoes, holiday décor). Making sure that location is designated, easy to access, and the most efficient use of space.
- Incorporate several cozy spots to sit, pause, and take in the peaceful corners that log cabins create.
- Don’t overlook the importance of a well planned kitchen – Kitchens and bathrooms are a special beast in log structures. So many design trends become awkward, or even impossible when up against log walls. Some of our clients don’t want to hide the logs with a wall of cabinetry, so then we have to design a kitchen that both functions well with ample storage, all the while having everything below the counter, or in a scullery or pantry room.
- Pay close attention to lighting. Log cabins are notorious for being dark and dreary, especially in winter months. A well planned cabin will have considerations for both daylight capture, effective interior ambient & task lighting, and great outdoor lighting that makes the cabin lifestyle feel like a memorable stay at a mountain resort!
- Consider the future – its easy to plan based on how you lived in the past, or even how you are living today, but taking in to account the possibilities of the 10-20 year future can often be overlooked. Preparing for aging in place with an accessible shower, or a space to fit an elevator when stairs become a challenge. We often incorporate bunkrooms make for a supreme adventure when future grandchildren come to visit.
Lastly, and this is probably the most important approach I can suggest to make the most of your move from a framed home to a log cabin: Imagine again, the feeling you desire to have the first time you walk into your new cabin for the first time. Imagine your surroundings, the things that will shape how you will enjoy it. Now see how much of that you can take away without losing that wonderful feeling. Remember that old saying: LESS IS MORE? Well, in a log cabin nothing could be more true! Plan for minimizing as much as possible: the separations between inside & outside living spaces (we do this with as few walls and as many windows/doors as possible), and the volume of furniture and décor that you put in a room. Allow the innate, earthy beauty of the natural materials that make up the log structure along with the amazing landscape to be the star of the show. Don’t overcrowd walls with a plethora of artwork and decorations. Love and appreciate that mother nature has painted a masterpiece with the wood and stone that makes up the structure, and the strong connection you will have with nature in your “adventurous vacation” dream cabin.
Written by Rochelle LD Zemlak
Founder/Architectural & Interior Design Director
Rochelle Lynne Design


